文档地址:JumpServer 文档

环境准备
| 操作系统 | 架构 | Linux 内核 | 软件要求 | 最小化硬件配置 |
|---|---|---|---|---|
| linux/amd64 | x86_64 | >= 4.0 | wget curl tar gettext iptables python | 2Core/8GB RAM/60G HDD |
| linux/arm64 | aarch64 | >= 4.0 | wget curl tar gettext iptables python | 2Core/8GB RAM/60G HDD |
| linux/loong64 | loongarch64 | == 4.19 | wget curl tar gettext iptables python | 2Core/8GB RAM/60G HDD |
Debian / Ubuntu
apt-get update
apt-get install -y wget curl tar gettext iptables
RedHat / CentOS
yum update
yum install -y wget curl tar gettext iptables
#安装docker
在线安装
#国内
curl -sSL https://resource.fit2cloud.com/jumpserver/jumpserver/releases/latest/download/quick_start.sh | bash#国外
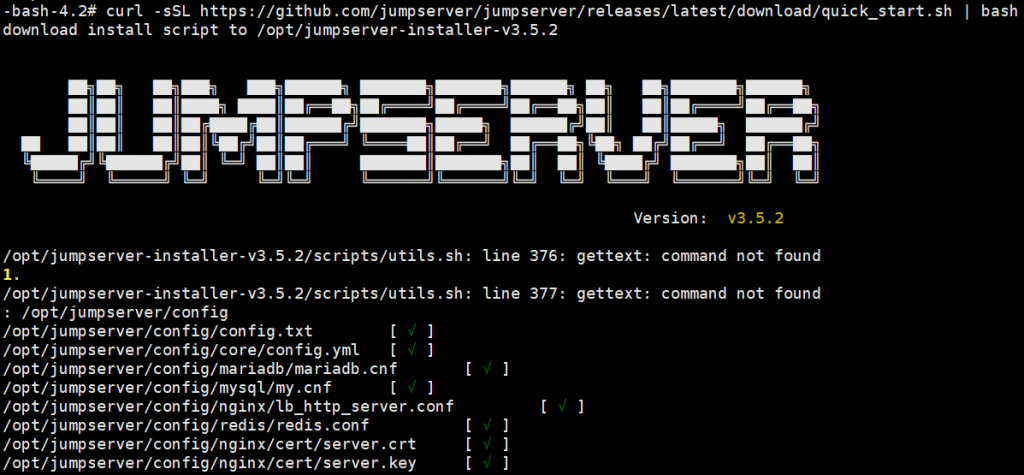
curl -sSL https://github.com/jumpserver/jumpserver/releases/latest/download/quick_start.sh | bash
#以下是详细过程
>>> Install and Configure Docker
1. Install Docker
complete
2. Configure Docker
complete
3. Start Docker
complete
>>> Loading Docker Image #可以手动拉下面的十个镜像
docker pull jumpserver/redis:6.2 jumpserver/mariadb:10.6 jumpserver/core:v3.5.2 jumpserver/koko:v3.5.2 jumpserver/lion:v3.5.2 jumpserver/magnus:v3.5.2 jumpserver/chen:v3.5.2 jumpserver/kael:v3.5.2 jumpserver/web:v3.5.2 -bash-4.2# docker images
REPOSITORY TAG IMAGE ID CREATED SIZE
jumpserver/web v3.5.2 667fb8e77b22 44 hours ago 1.04GB
jumpserver/chen v3.5.2 a539278a3501 44 hours ago 560MB
jumpserver/core v3.5.2 db424857bb4f 44 hours ago 1.7GB
jumpserver/koko v3.5.2 9c58b690bed9 44 hours ago 1.15GB
jumpserver/magnus v3.5.2 29f479c7b26c 44 hours ago 152MB
jumpserver/kael v3.5.2 9bad3c90ba8f 44 hours ago 315MB
jumpserver/lion v3.5.2 02a66df099d0 44 hours ago 236MB
jumpserver/redis 6.2 cdce48b062ac 3 weeks ago 105MB
jumpserver/mariadb 10.6 aac2cf878de9 8 months ago 405MB>>> Install and Configure JumpServer
1. Configure Private Key
SECRETE_KEY: wCsTDoL1dDt6tp1XKjQcf85N1LB9hFK6pFPxBZ7nQffhlapO
BOOTSTRAP_TOKEN: eF3lD1GXJa0XohqbBI0vf77Y
complete
2. Configure Persistent Directory
Do you need custom persistent store, will use the default directory /data/jumpserver? (y/n) (default n): complete
3. Configure MySQL
Do you want to use external MySQL? (y/n) (default n): complete
4. Configure Redis
Do you want to use external Redis? (y/n) (default n): complete
5. Configure External Port
Do you need to customize the JumpServer external port? (y/n) (default n): complete
6. Init JumpServer Database
[+] Running 4/4
✔ Network jms_net Created 0.0s
✔ Container jms_redis Healthy 11.2s
✔ Container jms_mysql Healthy 11.2s
✔ Container jms_core Started 11.5s#安装完成
>>> The Installation is Complete
1. You can use the following command to start, and then visit
cd /opt/jumpserver-installer-v3.5.2
./jmsctl.sh start
2. Other management commands
./jmsctl.sh stop
./jmsctl.sh restart
./jmsctl.sh backup
./jmsctl.sh upgrade
For more commands, you can enter ./jmsctl.sh --help to understand
3. Web access
http://172.18.0.1:80
Default username: admin  Default password: admin
4. SSH/SFTP access
ssh -p2222 admin@172.18.0.1
sftp -P2222 admin@172.18.0.1
5. More information
Official Website: https://www.jumpserver.org/
Documentation: https://docs.jumpserver.org/
[+] Running 10/10
 ✔ Container jms_redis   Healthy                    0.6s
 ✔ Container jms_mysql   Healthy                    0.6s
 ✔ Container jms_core    Healthy                    11.4s
 ✔ Container jms_koko    Started                    12.6s
 ✔ Container jms_web     Started                    13.2s
 ✔ Container jms_lion    Started                    12.4s
 ✔ Container jms_chen    Started                    11.9s
 ✔ Container jms_kael    Started                    12.9s
 ✔ Container jms_magnus  Started                    13.0s
✔ Container jms_celery Started 12.5s#安装完成后 JumpServer 配置文件路径为: /opt/jumpserver/config/config.txt
cd /opt/jumpserver-installer-v3.5.2

# 启动
./jmsctl.sh start

# 停止
./jmsctl.sh down

# 卸载
./jmsctl.sh uninstall

# 帮助
./jmsctl.sh -h
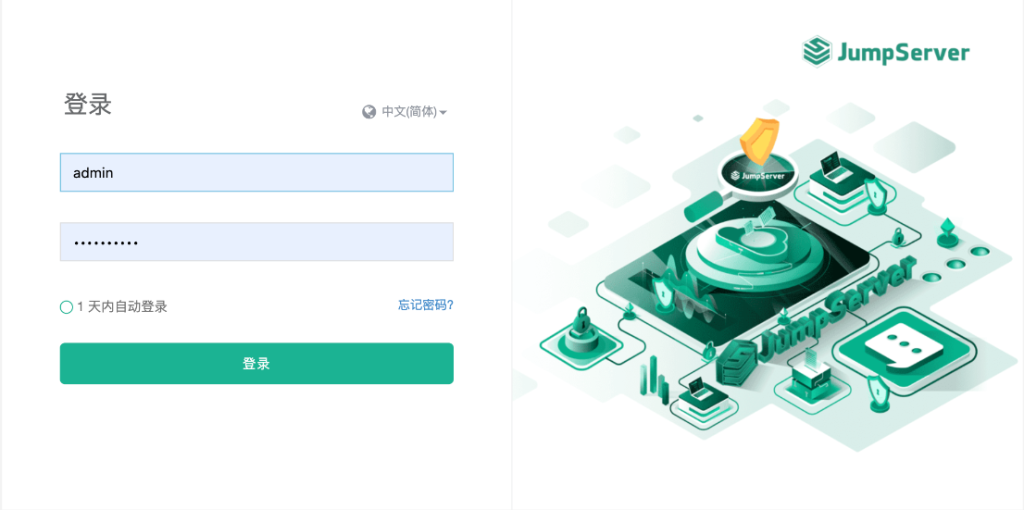
#安装成功后,通过浏览器访问登录 JumpServer
地址: http://<JumpServer服务器IP地址>:<服务运行端口>
用户名: admin
密码: admin
离线安装
#下载对应安装包并上传到部署服务器的 /opt 目录
| OS/Arch | Architecture | Linux Kernel | Offline Name |
|---|---|---|---|
| linux/amd64 | x86_64 | >= 4.0 | jumpserver-offline-installer-v3.5.2-amd64.tar.gz |
| linux/arm64 | aarch64 | >= 4.0 | jumpserver-offline-installer-v3.5.2-arm64.tar.gz |
| linux/loong64 | loongarch64 | == 4.19 | jumpserver-offline-installer-v3.5.2-loong64.tar.gz |
linux/amd64
cd /opt
tar -xf jumpserver-offline-installer-v3.5.2-amd64.tar.gz
cd jumpserver-offline-installer-v3.5.2-amd64
# 根据需要修改配置文件模板, 如果不清楚用途可以跳过修改
cat config-example.txt
# JumpServer configuration file example.
#
# 如果不了解用途可以跳过修改此配置文件, 系统会自动填入
# 完整参数文档 https://docs.jumpserver.org/zh/master/admin-guide/env/

################################## 镜像配置 ###################################
#
# 国内连接 docker.io 会超时或下载速度较慢, 开启此选项使用华为云镜像加速
# 取代旧版本 DOCKER_IMAGE_PREFIX
#
# DOCKER_IMAGE_MIRROR=1

################################## 安装配置 ###################################
#
# JumpServer 数据库持久化目录, 默认情况下录像、任务日志都在此目录
# 请根据实际情况修改, 升级时备份的数据库文件(.sql)和配置文件也会保存到该目录
#
VOLUME_DIR=/data/jumpserver

# 加密密钥, 迁移请保证 SECRET_KEY 与旧环境一致, 请勿使用特殊字符串
# (*) Warning: Keep this value secret.
# (*) 勿向任何人泄露 SECRET_KEY
#
SECRET_KEY=

# 组件向 core 注册使用的 token, 迁移请保持 BOOTSTRAP_TOKEN 与旧环境一致,
# 请勿使用特殊字符串
# (*) Warning: Keep this value secret.
# (*) 勿向任何人泄露 BOOTSTRAP_TOKEN
#
BOOTSTRAP_TOKEN=

# 日志等级 INFO, WARN, ERROR
#
LOG_LEVEL=ERROR

# JumpServer 容器使用的网段, 请勿与现有的网络冲突, 根据实际情况自行修改
#
DOCKER_SUBNET=192.168.250.0/24

# ipv6 nat, 正常情况下无需开启
# 如果宿主不支持 ipv6 开启此选项将会导致无法获取真实的客户端 ip 地址
#
USE_IPV6=0
DOCKER_SUBNET_IPV6=fc00:1010:1111:200::/64

################################# MySQL 配置 ##################################
# 外置 MySQL 需要输入正确的 MySQL 信息, 内置 MySQL 系统会自动处理
#
DB_HOST=mysql
DB_PORT=3306
DB_USER=root
DB_PASSWORD=
DB_NAME=jumpserver

# 如果外置 MySQL 需要开启 TLS/SSL 连接, 参考 https://docs.jumpserver.org/zh/master/install/install_security/#ssl
#
# DB_USE_SSL=True

################################# Redis 配置 ##################################
# 外置 Redis 需要请输入正确的 Redis 信息, 内置 Redis 系统会自动处理
#
REDIS_HOST=redis
REDIS_PORT=6379
REDIS_PASSWORD=

# 如果使用外置 Redis Sentinel, 请手动填写下面内容
#
# REDIS_SENTINEL_HOSTS=mymaster/192.168.100.1:26379,192.168.100.1:26380,192.168.100.1:26381
# REDIS_SENTINEL_PASSWORD=your_sentinel_password
# REDIS_PASSWORD=your_redis_password
# REDIS_SENTINEL_SOCKET_TIMEOUT=5

# 如果外置 Redis 需要开启 TLS/SSL 连接, 参考 https://docs.jumpserver.org/zh/master/install/install_security/#redis-ssl
#
# REDIS_USE_SSL=True

################################## 访问配置 ###################################
# 对外提供服务端口, 如果与现有服务冲突请自行修改
#
HTTP_PORT=80
SSH_PORT=2222
MAGNUS_MYSQL_PORT=33061
MAGNUS_MARIADB_PORT=33062
MAGNUS_REDIS_PORT=63790

################################# HTTPS 配置 #################################
# 参考 https://docs.jumpserver.org/zh/master/admin-guide/proxy/ 配置
#
# HTTPS_PORT=443
# SERVER_NAME=your_domain_name
# SSL_CERTIFICATE=your_cert
# SSL_CERTIFICATE_KEY=your_cert_key
#

# Nginx 文件上传下载大小限制
#
CLIENT_MAX_BODY_SIZE=4096m

################################## 组件配置 ###################################
# 组件注册使用, 默认情况下向 core 容器注册, 集群环境需要修改为集群 vip 地址
#
CORE_HOST=http://core:8080
PERIOD_TASK_ENABLED=True

# Core Session 定义,
# SESSION_COOKIE_AGE 表示闲置多少秒后 session 过期,
# SESSION_EXPIRE_AT_BROWSER_CLOSE=true 表示关闭浏览器即 session 过期
#
# SESSION_COOKIE_AGE=86400
SESSION_EXPIRE_AT_BROWSER_CLOSE=True

# Lion 开启字体平滑, 优化体验
#
JUMPSERVER_ENABLE_FONT_SMOOTHING=True

################################# XPack 配置 #################################
# XPack 包, 开源版本设置无效
#
RDP_PORT=3389
MAGNUS_POSTGRESQL_PORT=54320
MAGNUS_ORACLE_PORTS=30000-30030

################################## 其他配置 ##################################
# 终端使用宿主 HOSTNAME 标识, 首次安装自动生成
#
SERVER_HOSTNAME=${HOSTNAME}

# 当前运行的 JumpServer 版本号, 安装和升级完成后自动生成
#
CURRENT_VERSION=
# 安装
./jmsctl.sh install

# 启动
./jmsctl.sh start
#安装完成后配置文件 /opt/jumpserver/config/config.txt
cd jumpserver-offline-release-v3.5.2-amd64

# 启动
./jmsctl.sh start

# 停止
./jmsctl.sh down

# 卸载
./jmsctl.sh uninstall

# 帮助
./jmsctl.sh -h
#其他参考文档

