首先,你需要有一台服务器装有Centos7系统,至少4 核 CPU,4 GB 内存,40 GB 磁盘空间,推荐8 核 CPU,16 GB 内存,100 GB 磁盘空间。默认是以最小化安装的,前者可以满足需求,如果需要安装应用商店、DevOps等,4 核 4 G 远远不够。
以下是具体教程:
准备工作
#获取root权限
su
#输入root密码
#更新CentOS系统中的软件包和安装的软件,约10分钟
yum update -y
#停止和禁用防火墙服务,然后显示防火墙服务的状态
systemctl stop firewalld
systemctl disable firewalld
systemctl status firewalld
#关闭selinux,都执行一下
sed -i 's/enforcing/disabled/' /etc/selinux/config # 永久 # 将SELinux模式从enforcing改为disabled,并将更改写入/etc/selinux/config文件,以实现永久禁用SELinux
setenforce 0 # 临时 # 将SELinux模式临时设置为Permissive模式,即仅记录违规行为而不阻止它们
#关闭swap
sed -ri 's/.swap./#&/' /etc/fstab
swapoff -a

# 将/etc/fstab文件中所有包含"swap"的行前加上"#",实现禁用swap分区的永久设置
# 临时禁用所有的swap分区
#时间同步
yum install ntpdate -y # 安装ntpdate工具
ntpdate ntp5.aliyun.com # 将系统时间与阿里云的ntp5服务器进行同步
#安装依赖组件
yum install -y wget ebtables socat ipset conntrack curl # 这行代码使用yum命令在CentOS系统上安装了一系列工具和软件包,包括wget、ebtables、socat、ipset、conntrack和curl#安装docker
# 使用yum命令在CentOS系统上安装软件包yum-utils、device-mapper-persistent-data和lvm2
yum install -y yum-utils device-mapper-persistent-data lvm2
# 添加Docker CE的仓库源,使用阿里云镜像站作为源
yum-config-manager --add-repo http://mirrors.aliyun.com/docker-ce/linux/centos/docker-ce.repo# 快速生成 Yum 软件包管理器的缓存
yum makecache fast# 安装Docker,这个过程比较慢
yum -y install docker-ce-18.09.9-3.el7 docker-ce-cli-18.09.9#修改docker Cgroup Driver为systemd
sed -i.bak "s#^ExecStart=/usr/bin/dockerd.*#ExecStart=/usr/bin/dockerd -H fd:// --containerd=/run/containerd/containerd.sock --exec-opt native.cgroupdriver=systemd#g" /usr/lib/systemd/system/docker.service
systemctl daemon-reload
systemctl restart docker#设置自启动并查看状态
systemctl enable docker
systemctl restart docker
systemctl status docker#将阿里云镜像加速地址添加到Docker的配置文件中
cat > /etc/docker/daemon.json << EOF
{
"registry-mirrors": ["https://b9pmyelo.mirror.aliyuncs.com"]
}
EOF#重启并查看Docker的镜像注册表信息
systemctl restart docker
systemctl status docker
docker info | grep "Registry Mirrors" -A 1#查看docker版本
docker --version#docker 安装完成
准备工作完成
以 All-in-One 模式安装 KubeSphere
#检查dns
cat /etc/resolv.conf#设置kubernates仓库
# kubernetes是仓库的名称,baseurl指定了仓库的地址,enabled设置为1表示启用该仓库,gpgcheck和repo_gpgcheck都设置为0表示不进行GPG检查,gpgkey指定了仓库的GPG密钥的地址

 cat > /etc/yum.repos.d/kubernetes.repo << EOF
[kubernetes]
name=Kubernetes
baseurl=https://mirrors.aliyun.com/kubernetes/yum/repos/kubernetes-el7-x86_64
enabled=1
gpgcheck=0
repo_gpgcheck=0
gpgkey=https://mirrors.aliyun.com/kubernetes/yum/doc/yum-key.gpg https://mirrors.aliyun.com/kubernetes/yum/doc/rpm-package-key.gpg
EOF

#配置生效
yum makecache fast
#安装kubelet kubectl
#安装kubelet和kubectl的1.17.9版本
yum install -y kubelet-1.17.9 kubectl-1.17.9
#下载 KubeKey
#如果您能正常访问 GitHub/Googleapis
curl -sfL https://get-kk.kubesphere.io | VERSION=v3.0.7 sh -

#如果您访问 GitHub/Googleapis 受限
export KKZONE=cn
curl -sfL https://get-kk.kubesphere.io | VERSION=v3.0.7 sh -
#为 kk 添加可执行权限
chmod +x kk#开始安装
# export KKZONE=cn # 如果您访问 Googleapis 受限,在您执行以下步骤之前请务必再次执行
./kk create cluster --with-kubernetes v1.22.12 --with-kubesphere v3.3.2- 安装 KubeSphere 3.3 的建议 Kubernetes 版本:v1.20.x、v1.21.x、* v1.22.x、* v1.23.x 和 * v1.24.x。带星号的版本可能出现边缘节点部分功能不可用的情况。因此,如需使用边缘节点,推荐安装 v1.21.x。如果不指定 Kubernetes 版本,KubeKey 将默认安装 Kubernetes v1.23.10。有关受支持的 Kubernetes 版本的更多信息,请参见支持矩阵。
- 一般来说,对于 All-in-One 安装,您无需更改任何配置。
- 如果您在这一步的命令中不添加标志
--with-kubesphere,则不会部署 KubeSphere,KubeKey 将只安装 Kubernetes。如果您添加标志--with-kubesphere时不指定 KubeSphere 版本,则会安装最新版本的 KubeSphere。 - KubeKey 会默认安装 OpenEBS 为开发和测试环境提供 LocalPV 以方便新用户。对于其他存储类型,请参见持久化存储配置。
#视机器性能而定,这可能需要20分钟+
#如果你的机器CPU小于2核,内存小于4GB,可能会卡在这一步

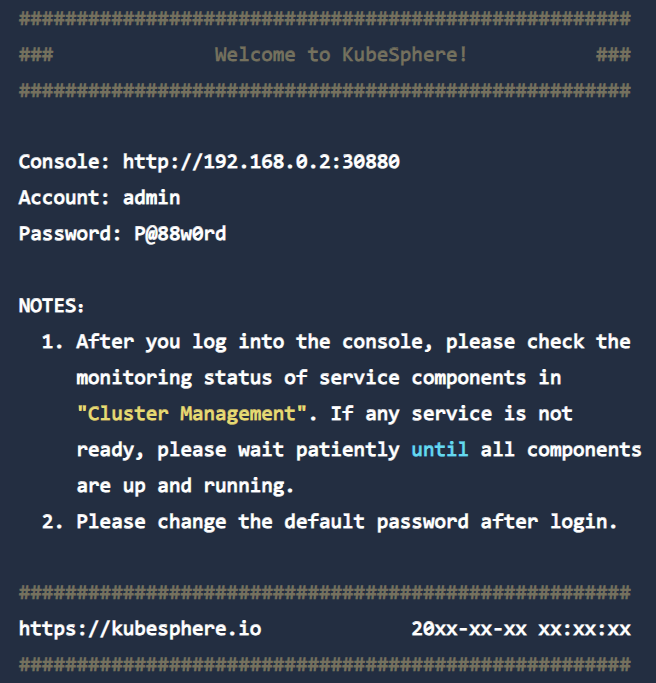
#安装成功

#检查安装
kubectl logs -n kubesphere-system $(kubectl get pod -n kubesphere-system -l 'app in (ks-install, ks-installer)' -o jsonpath='{.items[0].metadata.name}') -f

